Sunday, September 3, 2017

Get root access on Citrix XenMobile appliance 10.6.xx

After your Citrix XenMobile virtual appliance is up and running, you can login as "admin" with password configured.


However, a system menu always appears like above screen . You may ask, is there possible to login the system shell ?  i.e. /bin/bash

I will show you how to get root access without asking Citrix Support. This is an unofficial way.

Disclaimer:  I will not be responsible for any damage to your production system

Requirement :

  1. downloaded XenMobile appliance for vSphere  i.e. ova file
  2. some Linux knowledge
  3. a Linux KVM server  (Ubuntu KVM used in this example)
  4. ovftool 
Let's go.

At first, extract the vmdk file from the ova file download by ovftool


Convert the vmdk file to qcow2 format


Transfer this qcow2 file to Linux KVM server  and create a KVM virtual machine to boot it.

For XenMobile 10.6.xx, create a KVM virtual machine using following:


Disk Type = SATA


Network card Type = e1000


You can now boot it normally as if it run on vSphere or XenServer

Follow the initial configuration step at http://docs.citrix.com/en-us/xenmobile/server/install-configure.html


Now , you can login as "admin"  like following:


At this time, shutdown XenMobile virtual appliance

Log on your Linux KVM server as someone with root access. User "root" is used here.

load nbd mobule


locate the qcow2 disk file and connect it using qemu-nbd as a block device


Check the system partition location using fdisk


Mount the system partition i.e. nbd1p3


Modify the the shadow file (i.e. /etc/shadow) to allow root login and save file


umount the nbd1p3 device and disconnect /dev/nbd1


Boot the XenMobile virtual appliance again.

You can login as root properly


Type "passwd" here to set root password if needed. It is highly recommended. 

If you need to access the admin menu , type /opt/sas/sw/bin/console.sh

OR type "su - admin"


Exit by Ctrl + C

The management console web page is same as default i.e. https://FQDN:4443

With root access. you can investigate anything you need inside the appliance.


Saturday, December 31, 2016

Upgrading VMware AirWatch 8.4 core components (Feature Pack)


Upgrading VMware AirWatch 8.4 core components (Feature Pack)

VMware Airwatch is a powerful and comprehensive Enterprise Mobile Management Solution. It releases update as Feature Pack regularly (version no. does not change).

This article will go through the Feature Pack update of AirWatch core components (i.e. Console and Device Service) progress for version 8.4. Downtime is required for production system.

If you are using AirWatch Cloud, you are lucky as Airwatch do all task for you.
Reporting components upgrade are not required for Feature Pack upgrade in version 8.4 as time of writing.


Let 's go.

On your Console Server

Right-click “Airwatch_Application_8.4_FPXX_Full_Install.exe” to run as administrator

Wait…

Wait…

Repeat the steps above on your Device Service Server
Login your SQL database  hosting the AirWatch Database now.

Right-click “Airwatch_DB_8.4_FP07_Setup” and “run as administrator”

Click “Next”

Select “I Accept the terms in the license agreement” and Click “Next”

Click “Next”

Fill in Database Server location, database name and access credential
Click “Next”

Click “Install”

Wait….

Wait…

Almost done…

Click “Finish”

Go back to Console Server

On Console Server

Click “Yes”
Click “Next”

Select “I accept the term in the license agreement” and click “Next”


Click “Install”


Wait…

Wait…

Click “Finish”
Repeat steps on your Device Service Servers starting at “Go back to Console Server”

Optional but recommended: reboot Console and Device Service Servers after upgrade.

Monday, October 10, 2016

Running Citrix XenMobile Appliance on Linux KVM

Citrix XenMobile is one of famous Enterprise Mobile Management (EMM) solution. It is released in form of virtual appliance for hypervisor : Citrix XenServer, Microsoft Hyper-V and VMware vSphere. If your environment are all Linux KVM, how do you deploy it ?

I will show you one way for that.

Notes: Bolded phases are the job needed to do.

Firstly,  you have have to download the virtual appliance for vSphere i.e. ESXi

e.g. xms_10.4.0.116.vmware.ova  available at (login may be required) https://www.citrix.com/content/citrix/en_us/downloads/xenmobile.html

ova file is actually a tarball. Extract it easily by "tar xvf


ovf file is for vSphere deployment only, useless here. mf file is also useless here.

You need to convert this opt.vmdk into  KVM supported disk format e.g. qcow2, img, vhdx...
We use qcow2 here for example.

qemu-img  is a tool available in many Linux distribution e.g. Ubuntu, CentOS...


Copy the qcow2 file to your KVM host storage.

Then, we will use this qcow2 file as virtual disk to create a KVM virtual machine by virt-manager, useful KVM GUI, similar function to vSphere client in VMware vSphere .

In Virt-manager,  click the icon on left-hand corner


1. select "Import exist disk image" and click "Forward"


2. Broswe for the qcow2 file
Select OS Type "Linux" , version "CentOS 6.5" 
Click "Forward"


3. Assign CPU and Memory
Click "Forward"

4. Give it a Name, check box "Customize configuration before install" click "Finish".

Before boot it up, you need to change several virtual hardware (important !)

1. Change disk type to SATA

2. change network card to e1000


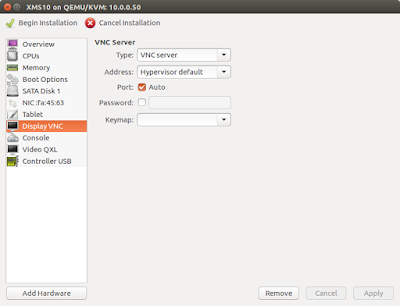
3. Change Display from Spice to VNC if needed and remove other stuffs like "Console", "USB redirect"...


4. click "Begin Installation" and virtual machine will boot up. Once you get the following screen, XenMobile is running on KVM host now.


5. Finally, follow "Configure XenMobile for First-Time Use" 
instruction at http://docs.citrix.com/en-us/xenmobile/10-4/install-configure.html

Thank you.


Sunday, May 15, 2016

Bringing Mirrored ( no witness) SQL database online after principal failed

In Microsoft SQL server, there is a high availability feature called Database Mirrioring which is quite old technology. 

If you have tried to configure a Database Mirroring with only 2 SQL servers ( SQL server 2014 in this example) with no witness, you may find that the mirrored database is not accessible after principal database offline. 

Now, we are going to bring it online.

After principal database is offline, the mirrored database is like below and no accessible.


Run SQL statement

alter database @dbname set partner off


Then you see something like below:


 The database is still not accessible.

Run SQL statement

restore database @dbname with recovery


 Now, the mirrored database is accessible. Your application  can use it again after data loss may exist.

Please note that if you try to create  database mirror using this database as principal, you will get error 1478. Please truncate the transaction log of this database first.